Photographer Oleg Ti knows light. He also knows how to share that knowledge. In this post he’ll use the D1 monolight to show us how to do a high-key portrait. It’s good stuff. Keep reading.

Many photographers just starting to work in the studio attempt to solve the difficulty of a well-lit high-key portrait by increasing the amount of light sources. They keep adding more and more softboxes, reflectors and umbrellas in their quest for a glossy and shiny portrait.
In my opinion, that isn’t the best approach. The main advantage of working in the studio is that you’re in absolute control of the light. You control the amount of light sources, the position of the light sources, the character of the light, etcetera. So rather than just adding more and more light sources, you should divert your focus to getting each and every light source to do exactly the thing you want it to do.
Personally, I always try to use as few light sources possible. I also prefer using hard lights to get extensive and concise pictures. So, here I’ll show you how to create a high-key portrait using four hard light sources.
Let’s begin!
1) Light The Background

The first thing I did was to put one bareheaded D1 monolight on each side of the model and direct both light sources towards the background.
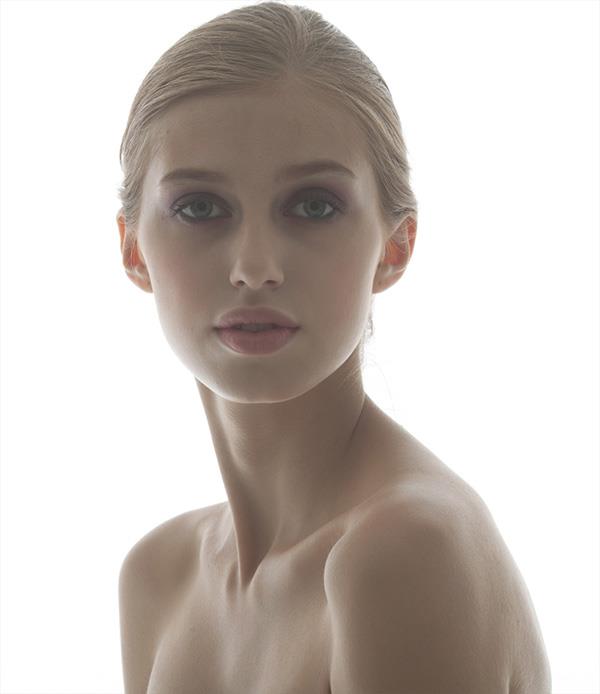
These lights will then act as both background lights and rim lights. You can clearly see that I’ve overexposed the background to create an even, white area. But what you might not notice at first is that I increased the power output of these lights 2-3 f-stops more than necessary to make the light bounce off the background. This created the nice and soft lighting effect that you can see on each side of the model’s head.
The reason why I start with the background/rim lights is that these will in most cases be the lights set to the highest output. In other words, these flashes maximum power output set the limit for how high I can go. So, I turn them up to get an image of how much light I have to work with and adjust the other light sources accordingly.
In this case I got 11.0 aperture. Of course, you know, I am not saying about shutter speed and ISO. In most situations, when you are shooting in the studio the parameters are 1/200 sec and ISO100.
You should also know that the model is standing very close to the background. This is necessary to get the soft effects on the sides of her face. The farther you are to the lighting source, the harsher the lights get. So to create a soft light effect on her face, I had to move her very close to the background, around 1-1.5 meters. Be aware that these lighting sources should not be direct on the model, I need only soft effects from the background, not direct hard, strong light from the lighting sources.
2) Set The Key Light

The next step is to set the key light. This will be placed right in front of the model’s face, as I already have have two symmetrical lighting pattern on each side of the model’s face.
The key light is a d D1 monolight equipped with a Beauty Dish. This not only creates creates a soft light, but also nice, round circles in her eyes. The key light doesn’t have to be place very high up, just slightly above her forehead level – high enough to not be visible in the shot!
3) Set The Fill Light

The next task is to reduce the dark shadows on the model’s neck. Remember: we’re working on a high key portrait here! There should be no deep shadows!
So what I did was that I tried using a silver-sided Collapsible Reflector in front and below the key light – just slightly lower than the position of my camera. As mentioned before, the closer the distance, the softer the light we get.
The Collapsible Reflector created a beautiful catch light in our model’s eyes. (The small, white dot underneath her iris.) But it didn’t really solve the problem of the dark shadows around her neck. The light bouncing off the Collapsible Reflector just isn’t strong enough. So, we need to add another light source!
So I added a fourth D1 monolight equipped with a Zoom Reflector, positioned at the same level as the key light but directed toward the Collapsible Reflector. The Zoom Reflector was equipped with a honeycomb grid to narrow its light beam. This was necessary to prevent any stray light from reaching the model’s face. I only wanted the spot of light bouncing off the Collapsible Reflector to reach her. And this is what the result looks like:

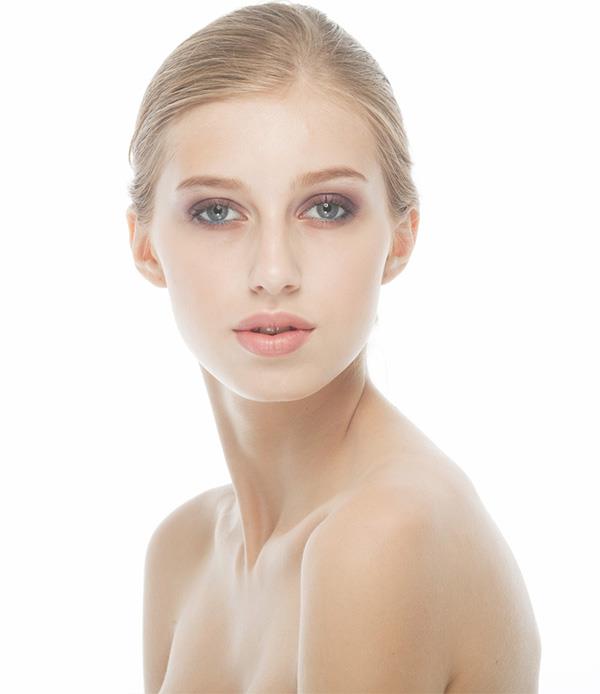
As you can see, the dark shadows are gone and we have beautiful catch light. Perfect. Nice, well-lit high-key portrait made with only hard light sources. Very bright, very simple, very direct.
4) Get a Deeper Understanding

Let’s turn off our background lights to get a better understanding of what our key light and fill lights are doing.
The image above was shot with the only key light and fill lights. Notice that the background had become grey and that the soft, bright lines of light on each side of the model’s face have disappeared. It’s still a nice shot. But it’s not a high-key portrait.
Well, that’s it. I think you know everything you need to know to create you’re own high-key portrait! You’ll find a behind-the-scenes shot from the shoot below. Also, if you have any question, feel free to leave a comment!
Good luck!
Oleg Ti
More tips and tricks from Oleg Ti
