In this tutorial, still life photographer Martin Botvidsson will guide you through all the steps he takes when shooting a premium perfume bottle. He will show you everything from how to build up the scene based on an idea, to how to work with several flashes and how to use retouching to put everything together.
“You might feel that you are an expert in all kinds of photography, but most of the time, that is not the case – especially in the eye of a client. That is why you need to focus on one niche. Clients don’t always go for the best option; they go for the least risky option!”
Step 1 - Find inspiration
Start off with finding inspiration for your image. One way is to search online. Pinterest is a good source to find really high end perfume bottle images. Don’t just copy an existing image – see it as an inspiration.
“I often take different elements from photos I appreciate. I find a light or a shadow pattern I like and apply it to my scene”, says Martin.

Step 2 - Use the right props
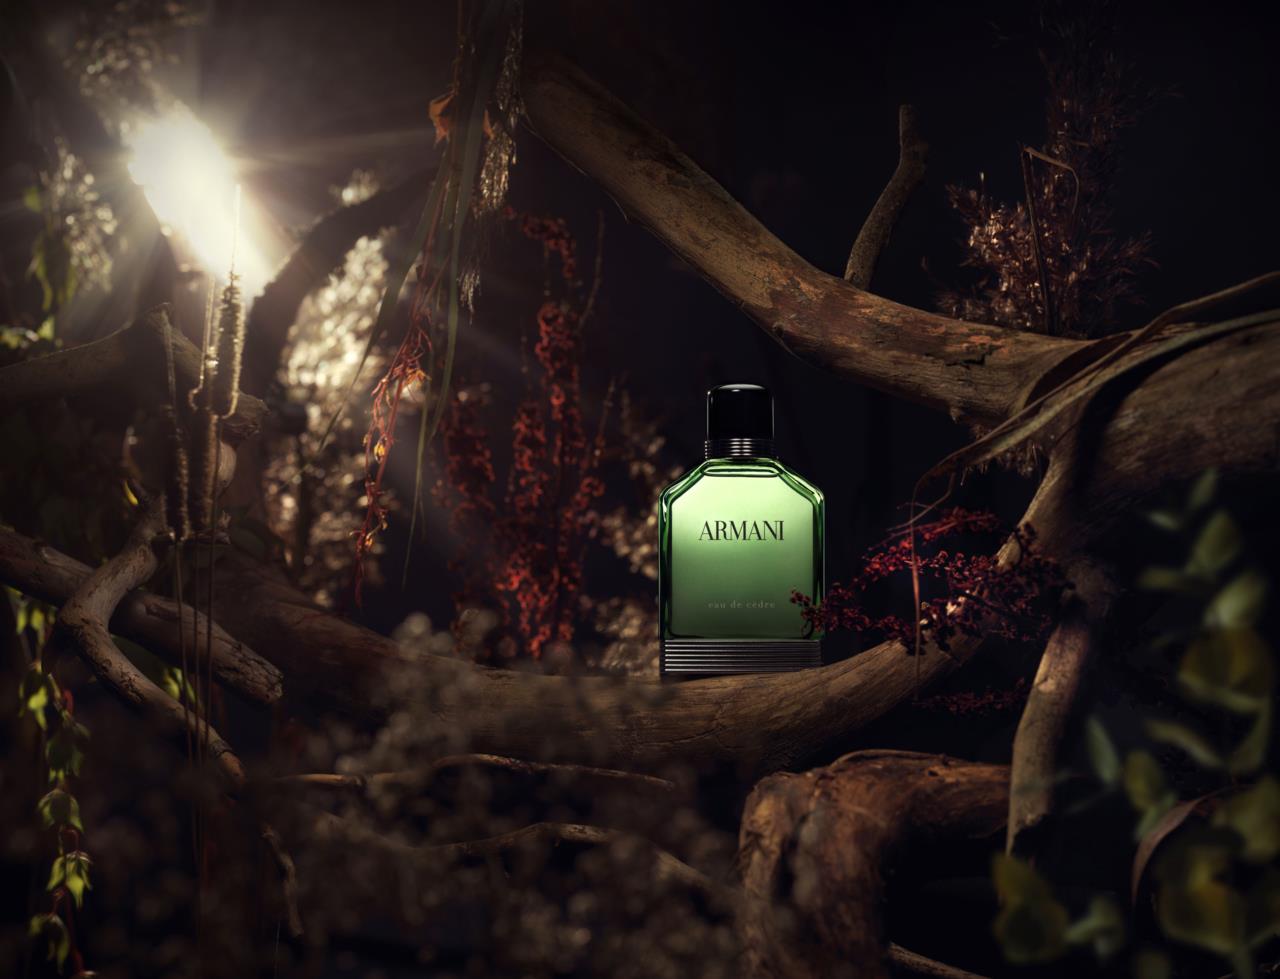
The hero of the shot is the perfume bottle, but it needs to be supported with the right props. For this image, Martin wanted to create a dark and mysterious atmosphere, so he went out to the forest to find dead branches and plants to reconstruct in the studio.
Step 3 - Set the scene/composition
Start by positioning your hero of the image, in this case the perfume bottle. Place it at the best spot for the composition. If necessary, secure the bottle by a fishing line. After you’ve set your placement of the product, start adding different elements in layers. Near to the camera and all the way to the far back. This will create more depth to the scene.
“In this image I wanted to add a red element to complement all the greens in the scene, so I placed the red plants close to the perfume bottle”, says Martin
Step 4 - Light the scene
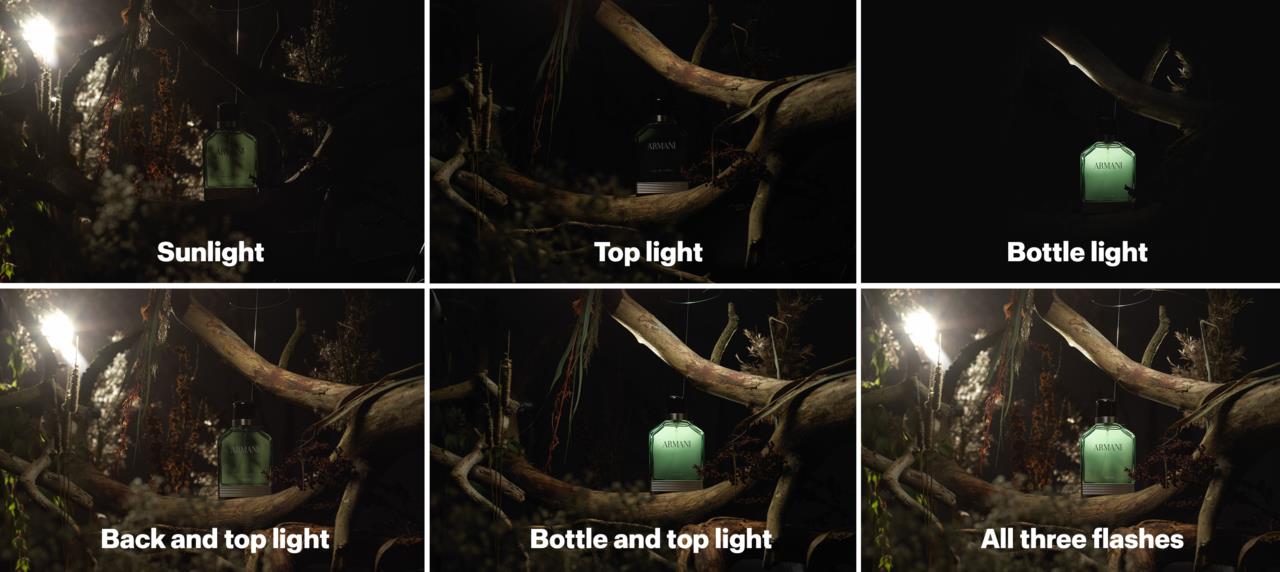
The back light. Start by setting up the light from the back. The back light is a Profoto D2 with a Zoom Reflector and CTO filter attached, to create a feeling of sunlight, and it should be positioned as far away as possible. Use the modelling light to see how the light falls over the scene and take a couple of test shots until you achieve the look you are striving for.
Bottle light. For the second light that will hit the bottle, use a Profoto D2 with a Zoom Reflector and a 5 degree grid to narrow the spread of light. Attach a piece of plastic to put on the bottle that will act as diffusion.
Top light. For the third and final light, use a Profoto D2 with a Zoom Reflector and a 10 degree grid and position it from above. Shoot through a diffusion panel to create a soft light on the branches around the bottle and to make them become more visible in the image.

For more details of the light setup, watch this section of the video.
Step 5 - Camera settings
Preferably, use a camera with the highest quality as possible (Martin is using a Hasselblad H6D-400c MS with a Hasselblad HC MACRO 4/120 II lens). Use the lowest ISO possible, the shutter speed on the camera’s maximum flash sync speed, and set the aperture to the desired depth of field. Make sure the ambient light doesn’t affect the photo.
Settings for Martin's image:
ISO 64, shutter speed 1/1000, aperture 8.
Step 6 and 7 - Take the shot and do the post production
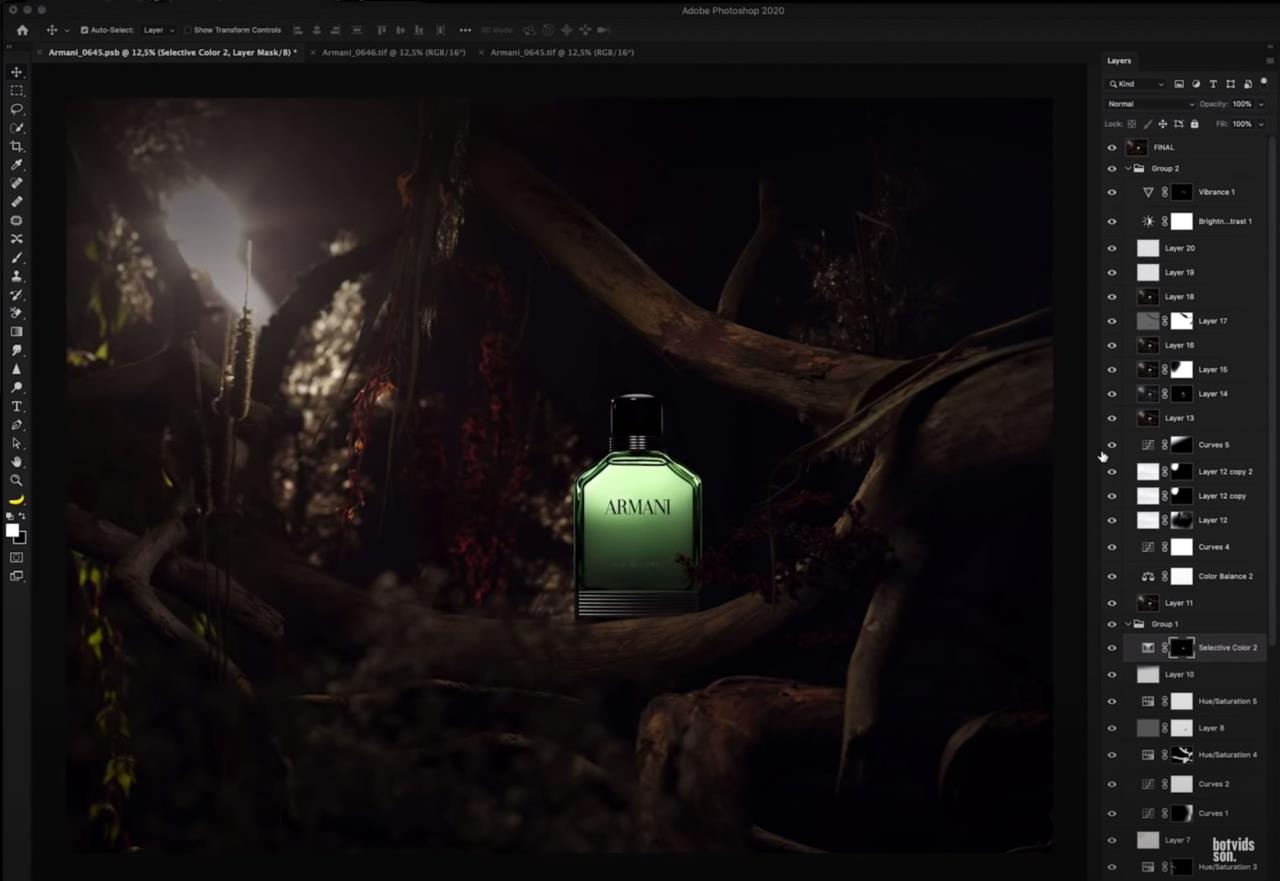
If necessary, take two separate shots and combine them later in Photoshop. One image with the overall light and one where you optimize the light for the bottle. It’s important that the light for the bottle is as beautiful as possible. When you finished, it is time to start doing the retouching. For more details on Martin’s retouch process for this image, click here.


