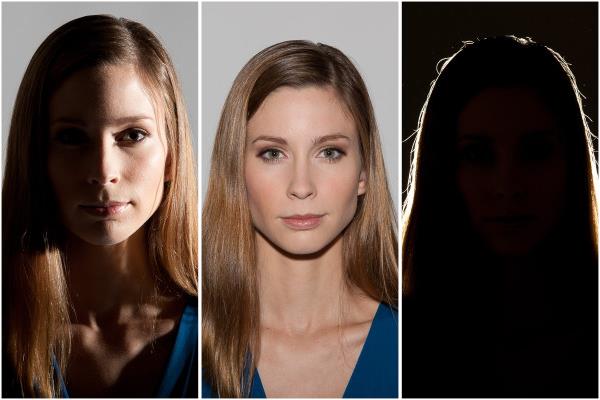
Next week I’ll be teaching another Profoto Webinar. We’ll be looking at the many looks of the 1-light portrait. Learning how to work with a single source of light is critical to becoming an accomplished studio portrait photographer. Working with a single light simplifies things, it removes the distractions of shadows and highlights that are created from other light sources. It allows you to focus on shaping the light using position of light and various Light Shaping Tools. We’ll be covering all of those things in the webinar, but in this article I want to focus on one thing: the position of your light.

The Position of Your Light
Where you place your light will have a dramatic effect on your image. The position of your light changes the contrast of your image. Contrast is the difference between the brightest and darkest areas of your image. Low Contrast images are evenly illuminated with almost no shadows. High Contrast images are lit unevenly and have dark shadows and bright highlights.

The Three Basic Positions
There are three basic positions of light: front light, side light, and back light.
Front Light is also described as on-axis light. It’s directly in line with the lens. Since there is the same amount of light falling from the left and right of the scene this light is very even. There are almost no shadows. This creates “flat” light that and very low contrast images.

Side Light is 90 degrees from the position of your lens. This light creates highlights on one side of your image and shadows on the other. Because one side of your image is bright and the other is in shadow this light creates high contrast images.

Back Light is 180 degrees from the position of your lens. This light is essentially pointing directly into your lens. Normally your subject will block the majority of this light and you’ll get a silhouette.

Shape and Form
When we see a two-dimensional object and understand what it is, we call that “shape”. When you see the silhouette of a tree, you intrinsically understand that it’s a tree.
Form is when we see the “depth” of our subject. If you see a photo of a tree with shadows that show you the tree is round and the trunk is large, you’re looking at “form”.
By moving your light from front light (no shadows) toward side light (more shadows) you’re creating form. When you continue to move the light behind your subject you’re creating shape. By playing with the position of light, you not only determine the contrast of your image you also choose to highlight shape or form.

Color vs Black & White
“Shape is the enemy of color” – Joseph Albers
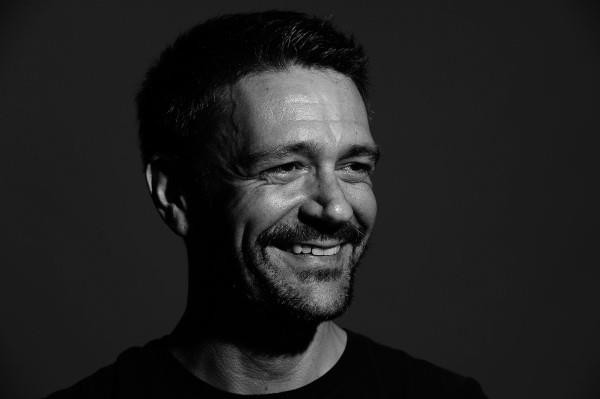
Things that are strong in shape tend to be monochromatic. If you want to create dramatic black and white images use side and back light. If you want to create beautiful color images use front light.

Side light emphasizes shape and is perfect for B&W images.

Front light emphasizes color.
Solving Issues
Sometimes a simple change in the position of a single light can take an image from ordinary to extraordinary.

In this photo I wanted to create a “jazz club” look. I’d asked the agency to send a model in her 40’s who looked like she’d been singing in clubs for awhile. They sent us a 17 year old model with nearly flawless skin. This was absolutely not the look I wanted. To hide the age of the model and to give the image a bit more light I simply shot into the light. This changed the direction of light from being just off left of the camera to back light. Enough light was reflected from the studio floor to give a bit of detail to the microphone.

Creating looks

Strong side light creates contrast and gives this image the moody feel I wanted.

I used a large 4×6 soft box about 50 degrees to camera right. The monochromatic tones of this image play with the direction of light to create an image full of texture and shape. If I’d used front light there would be no shadows to create form. The light was just far enough to the side to emphasize the shape of the screen.

This image was shot with a single Giant Reflector 300. This light is so large that I was actually standing directly in front of it. This created perfect front light. Since the reflector is parabolic the light is very directional to give the model shadows that outline her body. The color and vignette was added in post.
Now that you you know how the position of your light impacts your images get out there and try it yourself. You’ll be amazed at what you can create by simply adjusting the position of your light.
If you want to learn more about what you can do with just one light, sign up for our webinar and we will send you a reminder when its about to start.